This is an old revision of the document!
Table of Contents
RabbitMQ
RabbitMQ is a popular open source message broker. In a process data context, it can be used for buffering and/or routing data across networks and between servers.
Data Core supports this with two components:
- Rabbit MQ Producer - Writes process data to a queue
- Rabbit MQ Consumer - Reads process data from a queue
Getting Started
Enable RabbitMQ on Windows
RabbitMQ has several deployment options - below we provide our recommended approach.
1. Install Erlang
Erlang is a high-level programming language for real-time systems. It is a pre-requisite of RabbitMQ.
Download and run the Erlang 64bit Windows Installer.
2. Install RabbitMQ
Download and run the RabbitMQ 64bit Windows Installer.
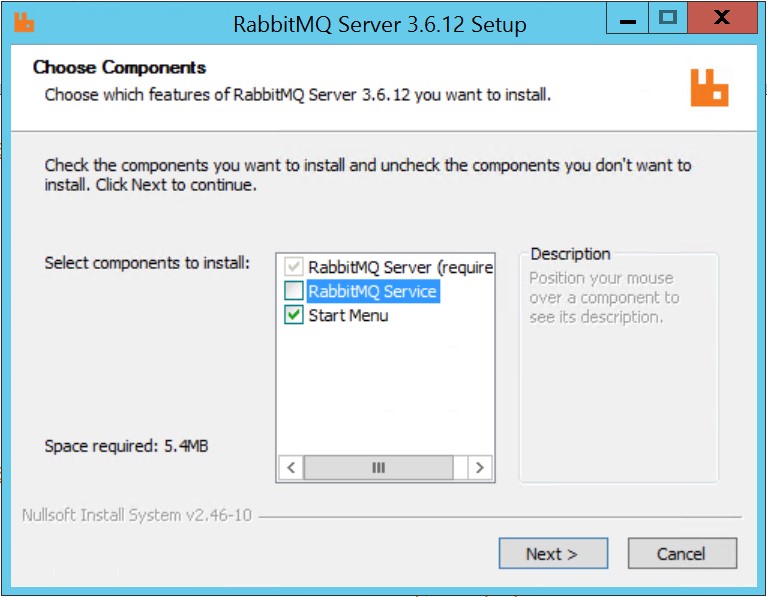
When prompted, untick the “Install RabbitMQ Service” option.
3. Configure RabbitMQ
Open “RabbitMQ Command Prompt” in admin mode and execute the following instructions.
set RABBITMQ_BASE=%PROGRAMDATA%\RabbitMQ
rabbitmq-service install
rabbitmq-plugins enable rabbitmq_management
rabbitmq-service start
The above actions installs the RabbitMQ service to the ProgramData directory (rather than the default action which installs the service to a user-specific AppData folder) and enables the admin UI.
4. Enable Shovel Plugin (optional)
The shovel plugin is only required on servers actively pushing data downstream to another server.
Open RabbitMQ Command Prompt in admin mode and enter
rabbitmq-service stop
rabbitmq-plugins enable rabbitmq_shovel
rabbitmq-plugins enable rabbitmq_shovel_management
rabbitmq-service start
RabbitMQ Administration
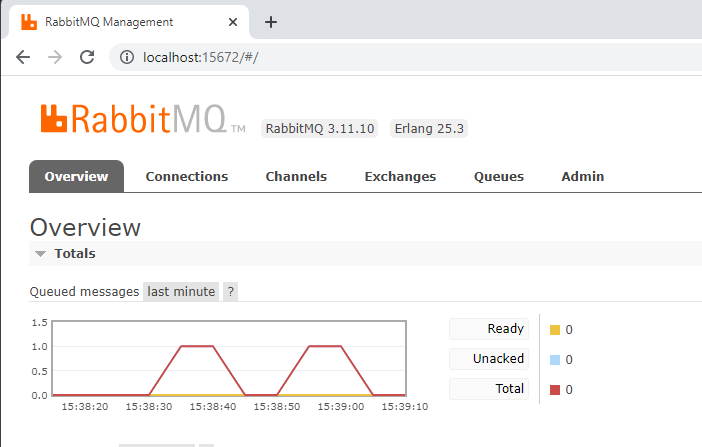
The RabbitMQ Admin UI is accessible on
http://localhost:15672/
Hint 
The default login is Guest/Guest.
This account account is only permitted for localhost login. Also note port 15672 is closed by default.
RabbitMQ Producer
RabbitMQ Producer writes tag-value data to a queue.
The default configuration writes persistent messages to a local, durable queue called “data_core.tag_values”. This means messages are stored to the hard drive and will survive a server restart.
The keys settings are:
- Routing Key
The routing key to set on messages containing snapshot/historical tag values.
RabbitMQ Consumer
RabbitMQ Consumer reads tag-value data from a queue.
The default configuration reads messages from a local queue called “data_core.tag_values”. The driver will create this queue if it doesn't already exist.
The keys settings are:
- Queue Names
A comma-delimited list of RabbitMQ queues to read tag values and/or event messages from.
How to use RabbitMQ for Secure Resilient Data Transfer
RabbitMQ supports server to server message transfer via the plugin RabbitMQ Shovel.
- Messages are not removed from the source queue until an ack is received from the destination queue.
- It supports TLS data encryption.
Altogether, RabbitMQ provides the ideal conduit for Data Core to employ for resilient and secure process data transfer.
1. Enable RabbitMQ Shovel
RabbitMQ Shovel is a required on the source/upstream RabbitMQ server. If not already enabled, do so now.
Open RabbitMQ Command Prompt in admin mode and enter
rabbitmq-service stop
rabbitmq-plugins enable rabbitmq_shovel
rabbitmq-plugins enable rabbitmq_shovel_management
rabbitmq-service start
2. Configure Firewall Rules
Firewall rules must be configured on the destination/downstream RabbitMQ server.
Open Windows Defender Firewall and configure two new Inbound Rules:
| Name | Description | Port |
|---|---|---|
| AMQP | Advanced Message Queue Protocol - employed by RabbitMQ | 5672 |
| AMQPS | Advanced Message Queue Protocol Secure - employed by RabbitMQ | 5671 |
The AMQP rule should only be employed for testing and can be disabled when not required. We also recommending resticting access to the above rules by specifying the permitted “Remote IP Address” scope.
4. Create a RabbitMQ User
A new user must be defined on the destination/downstream RabbitMQ server. The source will use this for authorization.
- Open RabbitMQ Administration UI (http://localhost:15672/)
- Select Admin > Users
- Add User
- Name: data_transfer_user
- Password: <you decide>
5. Create a Self-Signed CA Certificate
The certificate is used for TLS encryption.
Create a self-signed CA certificate, save it to a PFX file that can be stored in a secure location when issuing new certificates in the future, and save the certificate (without the private key) to a PEM file that can be copied to the upstream server and used directly by RabbitMQ and indirectly by the upstream Data Core node after being imported into the Trusted Root Certificate Authorities store there.
Create a certificate for a downstream RabbitMQ broker that must act as a server for local and remote clients (i.e. requires the Server Authentication EKU in the certificate) and save the certificate and private key to PEM files for use by RabbitMQ.
On the destination/downstream server, create folder:
C:\Program Files\RabbitMQ Server\certs
and add the following files:
- ca.crt
- downstream-rabbitmq.crt
- downstream-rabbitmq.key
On the source/upstream server, create folder:
C:\Program Files\RabbitMQ Server\certs
and add the following files:
- ca.crt
6. Create RabbitMQ Configuration File
On the downstream/destination server, create file:
%AppData%/RabbitMQ/rabbitmq.conf
Add the following settings:
listeners.ssl.default = 5671
ssl_options.cacertfile = C:/Program Files/RabbitMQ Server/certs/ca.crt
ssl_options.certfile   = C:/Program Files/RabbitMQ Server/certs/downstream-rabbitmq.crt
ssl_options.keyfile    = C:/Program Files/RabbitMQ Server/certs/downstream-rabbitmq.key
ssl_options.verify     = verify_none
ssl_options.fail_if_no_peer_cert = false
On the source/upstream server, create file:
%AppData%/RabbitMQ/rabbitmq.conf
Add the following settings:
ssl_options.cacertfile = C:/Program Files/RabbitMQ Server/certs/ca.crt
7. Configure RabbitMQ Shovel
On the source/upstream server, open the RabbitMQ Admin UI.
Select Admin > Shovel Management > Add a new shovel
Complete the form as follows:
| Name | Data Core Tag Values |
| Source | AMQP 0.9.1 |
| URI | amqp: | | Queue | data_core.tag_values | | Prefetch count | | | Auto-delete | Never | | Destination| AMQP 0.9.1 | | URI | amqps:data_transfer_user:<password>@<servername> |
| Queue | data_core.tag_values |
| Add forwarding headers | No |
| Reconnect delay | |
| Acknowledgment mode | On confirm |


